Back to WordPress

The more astute readers out there will have noticed that there’s been a slight design change around here. I’ve actually just finished migrating from Hugo to WordPress. But why? When I first resurrected this blog, I wrote a post about my reasons for selecting a static site generator (Jekyll then Hugo) in the first place. So what went wrong?

Well to be honest, although the setup was working really well most of the time, there were a few situations where I found it lacking.

Drafts

I was finding the process of writing a draft post a bit “fiddly”. Because every commit to the blog’s Git repository is deployed automatically, I couldn’t commit any unfinished writing without first remembering to set some special flags at the top of the post, in the front matter. Those flags would need to mark the post as a draft, tell the system not to render the page, and not to add it to the posts list and RSS feed. Occasionally I would forget those steps and accidentally “publish” a half-finished mess. It was a bit frustrating.

Image galleries

Dealing with images was also painful. You’d need to deal with naming them, putting them in the right subfolder, and then adding them to the document using a shortcode. I ended up writing some custom code to make creating a gallery of images easier, as I was finding myself making use of the feature quite often, but it was still quite painful to deal with.

Writing on the go

The static site generator approach required me to have a way of writing Markdown and then committing it to a Git repository, then finally pushing the changes up to GitHub. There were plenty of times where I’d be waiting for an appointment, or going somewhere on public transport, where I could’ve done some writing, but this process doesn’t lend itself well to a smartphone environment. It just wasn’t feasible.

I tried to get a workflow going using a really nice Markdown editor called iA Writer, which is a great bit of software, but I was still left with the problem of how to manage the Git side of things. Writing the posts was one thing, but getting them published via my Git workflow just wasn’t a great experience on the go.

Looking at alternatives

If something isn’t working right, try something different. There’s really no need to settle. I decided to look into my options.

I started with some research of various approaches. I wanted something flexible, but not complicated. I wanted something that had a nice editing experience, and good performance. I had also decided that my days of self-hosting were over, so I wanted something that provided a fully hosted version, so I could forget about managing anything, and just focus on writing.

I looked at what some of my friends were using. Things like Medium, or Substack seemed to have a slightly different aim, and I wasn’t sure about some of their policies. Eventually I found myself right back at WordPress. Many years had past since I last used this software, and I was pleasantly surprised to see how it had evolved, so I decided to take it for a whirl.

Gutenberg

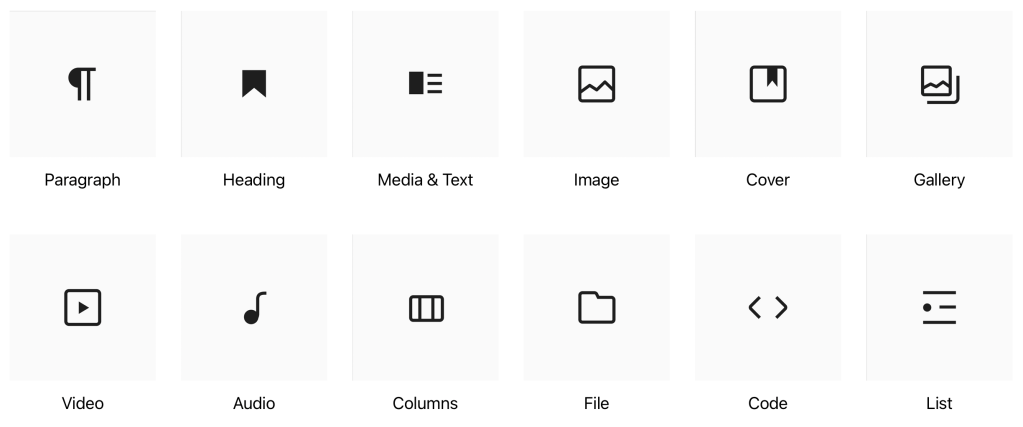
The star of the latest version of WordPress has to be the new Gutenberg editor. This new way of creating your posts and pages relies on a range of different components called “blocks”, which you can move around the page as required, and it really gives you a huge amount of flexibility. There is an interactive demo of Gutenberg which you can explore for yourself to see what I mean.

Some of the block types Gutenberg has to offer

Themes that support this type of editor are pretty customisable too, offering predefined areas on the page for you to edit, such as footer, sidebar, and header areas, giving you a remarkable amount of flexibility without needing to do any coding at all. You can also create reusable templates of common blocks to avoid having to edit them in multiple different places.

Initially I did find it a bit daunting, but I stuck at it, trying the various pieces out, and in the end I found that I quite liked it. I decided to bite the bullet and started the process of moving back to WordPress.

Migrating

I decided to migrate my previous posts manually rather than using a tool. This gave me the opportunity to re-work some of the posts I was less happy with, and after all we were only talking about a dozen posts, so I knew it wouldn’t take too long. This also gave me the chance to check the formatting, make sure hyperlinks worked, and to take advantage of the Gallery block to upload the full sized versions of any images I had used.

Migration was straightforward because in most cases I was able to copy and paste from the existing site into Gutenberg, and it correctly interpreted everything, including subheadings, code blocks, and even things like pull quotes; they were all converted correctly into the equivalent block type.

Finally, I decided I didn’t want to have to deal with comments on the posts, so I turned off the entire commenting feature. I figured people can always reach me on Mastodon to discuss things, and having to deal with the inevitable spam here didn’t appeal.

I checked everything looked good, checked the RSS feed was working properly, and hit the button to go live. The rest, as they say, is history.

I’m pretty happy with how it’s turned out, and I’m hoping this will encourage me to post more as well.

Here’s hoping!

Switching from Docker Desktop to Colima

I use Docker containers to automate the setup of development environments in a standard and repeatable way. It makes it very easy to spin up applications locally during development, and especially to ensure everyone working in a team has a consistent environment.

The Docker Engine is actually built on top of a few Linux technologies, including Kernel namespaces and control groups (cgroups), and various filesystem layers. They work together to isolate what’s in the container from your computer, whilst sharing the common pieces, to avoid duplication.

But the Mac does not use the Linux kernel, it uses the Darwin hybrid kernel. So how can we run technology built for Linux on a different Kernel?

Virtualisation

The answer is virtualisation, where we create a virtual version of our computer at the hardware level, but run a different operating system inside it, in this case Linux!

When you install Docker Desktop on a Mac, this is exactly what is happening behind the scenes:

  • A Linux virtual machine (VM) is created behind the scenes, and the Docker Engine is installed inside it.
  • Docker command line tools are installed onto your Mac, and configured to talk to the Docker Engine inside the Linux VM.

In this way, Docker Desktop provides a turnkey solution for running Docker on a Mac.

Older versions of Docker Desktop used a technology called HyperKit to manage the VM, but have more recently transitioned to Apple’s Virtualization Framework which provides greater performance, thanks to support for the Virtual I/O Device specification.

Colima

Recent licensing changes made it quite a bit more expensive for businesses to use Docker Desktop, but there are free and open source alternatives.

Colima is a free and open source project which handles running Docker Engine inside a lightweight Alpine Linux virtual machine. It is a little more work to get started, but once you’re up and running it acts like a drop-in replacement, compatible with all the same Docker commands you are used to.

Image from the Docker Blog.

Installing

You will need to make sure you have Homebrew installed first. Next, quit Docker Desktop, then run the following commands:

# Install Colima and the Docker command line tools:
brew install colima docker docker-compose docker-buildx

# Enable the Compose and BuildKit plugins:
mkdir -p ~/.docker/cli-plugins
ln -sfn $(brew --prefix)/opt/docker-compose/bin/docker-compose ~/.docker/cli-plugins/docker-compose
ln -sfn $(brew --prefix)/opt/docker-buildx/bin/docker-buildx ~/.docker/cli-plugins/docker-buildx

# Add the following to your zsh/bash profile, so Docker can find Colima:
# (don't forget to reload your shell)
export DOCKER_HOST="unix://${HOME}/.colima/default/docker.sock"

Now you’re ready to create the virtual machine where the Docker Engine will run, using the correct command for your version of macOS:

  • macOS 13 “Ventura” – uses macOS Virtualisation Framework with Virtiofs for the best possible performance:$ colima start --vm-type vz --mount-type virtiofs
  • macOS 12 “Monterey” or older – uses QEMU with SSHFS$ colima start

Colima will use 2 vCPUs and 2GB RAM by default, but if you run a lot of containers at once, you may need to adjust that. For example, to double the resources, add --cpu 4 --memory 4 to the colima start command you used above.

You can now verify everything is running properly:

$ colima status
INFO[0000] colima is running using macOS Virtualization.Framework
INFO[0000] arch: aarch64
INFO[0000] runtime: docker
INFO[0000] mountType: virtiofs
INFO[0000] socket: unix:///Users/ryan/.colima/default/docker.sock

$ docker system info | grep Operating
  Operating System: Alpine Linux v3.16   # if it says Docker Desktop here then something is wrong

You should now be able to use docker and docker compose commands normally, they should all Just Work™ transparently.

When you next reboot your Mac, you will need to remember to run colima start to bring the virtual machine back up, before you can use Docker again.

Importing your existing data?

Now that you have Colima up and running, you’ll have noticed that things look pretty sparse. This is because all the existing container images and volumes are still within Docker Desktop’s managed VM.

If this data is important to you, Docker provides a way to backup and restore containers, and also a way to migrate data volumes.

I decided to skip this step as my own use of Docker is for local development. Any data I have in Docker is regenerated automatically when I run my projects.

Cleanup

Assuming you got this far and you’re happy with Colima, you will probably want to send your old Docker environment to the Trash, otherwise the containers and volumes will stick around consuming valuable disk space.

You can use the following commands to tidy everything up:

# Remove old Docker data:
rm -rf /Users/${USER}/Library/Containers/com.docker.docker

# Remove the old Docker Desktop application:
# Note: If you installed it via Homebrew as a Cask,
# run `brew remove --cask docker` instead.
rm -rf /Applications/Docker.app

# Remove the old Docker configuration files:
sudo rm -rf /usr/local/lib/docker
rm -rf ~/.docker

Enjoy!

Switching to Starship

A long time ago, I started experimenting with customising my Bash shell prompt. Rather than just showing the current working directory, I wanted to add snippets of useful information to my prompt. I started with displaying the currently active branch of a Git repository. Next I added code to show which version of a particular programming language was selected.

I continued making improvements to only show the relevant information at the right time, for example hiding the Git branch if I wasn’t currently in a Git repository. and the same with the language version. This stopped the prompt becoming too large and cumbersome.

Problems Arise

Over the years I added more code to this custom prompt, as new technologies were added to my toolbox, however problems started to show.

This custom prompt code isn’t just executed when you open a new tab, it’s run every time the prompt has to display. So the amount of code you put in there has an impact on how quickly your prompt will display. Over the years, it had become so bloated that it was now taking several seconds to execute, and remember this was happening every time the prompt needed to be displayed.

Let’s just say this Bash script had evolved very … organically … and making changes to it was becoming more difficult. Some of the more “artisanal” parts from the early days had become almost undecipherable.

Refactor

My initial fixes were to go through the oldest parts of the prompt code involved janky functions for setting custom colours, and were needlessly defining variables all over the place. Some other areas were invoking commands in subshells and capturing the output, in order to use it later, when in reality they always returned the same value, and were just wasting cycles.

I ripped all of this out to reduce the amount of code being executed, removing code defining colours I never used, and replacing subshells with constants defined at the top of the script. I also looked into the performance of things like rbenv and pyenv to see if they could be sped up.

Performance got a lot better, but it was still taking around a second or so. Satisfied for the time being, I made a note to look into alternatives in the near future.

Board the Starship

A friend of mine had previously recommended a cross-shell prompt called Starship which is written in Rust, but my initial experiments hadn’t been very successful. Given Rust programs have a reputation for being blazing fast, I thought it was time to see how the project had progressed, and maybe give it another try.

I’m happy to say this time, I was able to get Starship to do everything I wanted.

Install

I followed the official documentation to install Starship via Homebrew:

brew install starship

I did not opt to install their “Nerd Font” as this is only needed if you want to make use of the various icons and logos in your prompt, and I wanted to keep things simple.

Next step was to disable my old custom prompt code, and replace it with this:

export STARSHIP_CONFIG=~/.starship.toml
eval "$(starship init bash)"

Notice I have set a custom configuration file location, this is purely because I already have a system for synchronising my config files between systems, and the default location wasn’t suitable. You can probably skip that step.

Restarting the shell I was greeted with my new super fast prompt!

Configuration

The default prompt configuration tries to cover all the bases, but I found it too verbose, so I took a look at the configuration options.

Firstly, I wanted to limit what was displayed to a few key pieces of information, rather than have every supported option jostling for position. I wanted to have the prompt on a single line, and show only the current working directory, Ruby and Python information, the current Git branch, and finally the prompt character:

# ~/.starship.toml
add_newline = false
format = """
$directory\
$ruby\
$python\
$git_branch\
$character
"""

Next I wanted to customise the sections I had enabled so they didn’t show a symbol, and were all bracketed, so each section would be distinct, yet compact. I started by using the Starship presets and then made my modifications on top, resulting in this extra config:

# ~/.starship.toml
[git_branch]
format = '\[[$symbol$branch]($style)\]'
style = 'bold white'
symbol = ''

[python]
format = '\[[${symbol}${pyenv_prefix}(${version})(\($virtualenv\))]($style)\]'
symbol = ''

[ruby]
format = '\[[$symbol($version)]($style)\]'
symbol = ''

Finally I wanted to make the directory section better match the others, by bracketing it, and making it show the full file path for clarity:

# ~/.starship.toml
[directory]
truncation_length = 0
truncate_to_repo = false
format = '\[[$path]($style)[$read_only]($read_only_style)\]'

You can see all the options for the prompt sections I have used below:

Result

The end result looks exactly the same as my old custom prompt did, which is a testament to the customisability of Starship. The performance difference is striking. Bash now starts almost instantly, and my prompt returns so quickly it’s almost imperceptible.

I’m a big proponent of making time to address seemingly small issues like these. They have a habit of building up over time, until every interaction you’re having with your computer is like drying yourself with sandpaper.

I’m very happy I took another look at Starship, and can finally tick this off my todo list.

Git Commit Etiquette

Clear, meaningful, commit and pull request messages are essential when working on a shared codebase. They serve a couple of important purposes:

  • They help everyone find out later why a particular change was made to the code, by making search results more relevant.
  • They speed up the reviewing process and make it easier for the reviewer to understand the intention behind a change.

What makes a good commit?‌

When writing your commit message, try to consider whether it answers these questions:

  1. Why is this change necessary?
    • Does it add a new feature? Does it fix a bug? Does it improve performance? Why is the change being made?
  2. How does this change address the issue?
    • For small obvious changes this might not be necessary, but for larger changes a high level description of the approach used can be helpful.

Try to keep your commit messages small; no more than a sentence or so. Make sure you focus on answering the “why?” question.

If you need more space to explain your commit, add a message body separated from the summary with a blank line, like so:

Short summary of changes here.

More detailed explanatory text, if necessary. Wrap it to about 72 characters or so,
but you can add as many paragraphs as you need to explain the change properly.

Imagine the first line is like the subject of an email (it's what most Git clients
will show prominently), and the rest of the text is the body of that email.

  * You can even use bullet points like this one.

  * And this one!

If you are finding it difficult to write a commit message in this format, it may mean that your commit represents too many different changes, and should be broken up. This doesn’t mean to say you should be creating a new commit for every insignificant change, that’s not what we’re aiming for here, instead try to create commits that represent groups of changes that are moving you closer to your end goal iteratively.

Continuous Integration and Continuous Deployment (CI/CD)

CI/CD pipeline, as depicted by RedHat

The concept of Continuous Integration can help guide us here. This is the practice of merging developers’ commits into the main branch several times per day.

This concept often goes hand in hand with the practices of Continuous Delivery and Continuous Deployment, meaning your changes are being merged to main, and then automatically deployed to production, several times per day. This gives you a really tight feedback loop, and prevents changes from building up which would otherwise lead to the dreaded big bang release.

In order for this to be successful, we need to make sure our commits contain working changes that can be deployed to production. Also think about what would happen if a deployment needed to be rolled back to a previous commit?

We need to consider all of these things when creating our commits.

Staging Partials

What happens if you’ve made several unrelated changes to the same file, and you aren’t ready to commit some of those changes yet? You can use Patch Mode to stage specific modifications to a file, so you can commit just those changes, instead of needing to commit the entire file and every change.

Many editors support staging partials, for example Visual Studio Code.

Bad Habits

Here are some things to avoid when committing:

Large commits

One extreme I’ve seen is waiting until the end of the day and then doing one big commit with every change from that day. Don’t do this!It results in a huge useless diff of likely unrelated changes. Other contributors working on the repository will find it more difficult to read and understand your work. This also applies to yourself once enough time has passed!Consider making small, regular commits as you go, in groups of related changes, rather than everything at the end in one go.

Per-file commits

On the other side of the spectrum, I’ve also seen people creating one commit for each file that was changed, but when adding a new feature to a project, you’ll often be making changes across several files.Commit all of the changes related to the new feature together, in a single commit. This avoids leaving the project in a broken state if someone pulls a commit that has a half implemented feature in it. It’s also easier for people to review.Of course, if the change did only need to touch a single file, then this is ok.

Lazy commit messages

Avoid any commit message along the lines of changed $filename or misc fixes. These messages are frustrating to encounter, and make it much harder for others to see what is happening in the project. They should be avoided in favour of a concise, meaningful message.We can see that the file was changed, what we want the answer to is “why?”.GitHub’s web-based editor doesn’t exactly help here, as it defaults to Update <filename> as the placeholder text. Make sure you provide a better message before you click that Commit changes button.

Unrelated changes

As we’ve discussed above, you should aim to create one commit per feature. Don’t include unrelated changes in the commit, as it makes it harder for others to reason about the changes being made. This will also make it more difficult for reviewers.

Branches and Merging Strategies

Image generated using machine learning with Stable Bee.

If you’re not pushing directly to main, you’ll be using branches instead. This advice is just as valid for branches, but my recommendation would be to use short-lived feature branches. You want to get the code merged into main as quickly as possible, as the longer a branch remains the more likely you are to have problems merging it, as the code continues to diverge.

GitHub uses the Pull Request approach to merge changes back to the main branch, and offers a number of merging strategies you can use.

Merge commits

Adds all the commits from the branch to the main branch via a merge commit. You can continue adding new commits to the branch if necessary, and merge them later. This is the default behaviour.

Squashing merge commits

Creates one commit containing all of the changes from every commit in your branch. You lose information about when specific changes were originally made and by who.If you continue adding new commits to a branch after squashing and merging, when you attempt to merge the branch again, the previously merged commits will show up in the PR, and you’ll potentially have to deal with conflicts.

Rebase and merge

All commits from the branch are added to the main branch individually without a merge commit, by rewriting the commit history. This is a tricky strategy which can sometimes require manual intervention to resolve conflicts on the command-line rather than via GitHub’s web interface. This would then require a force-push to resolve, which is a dangerous feature, and can result in other contributors work being lost.

Even when you are not using the default strategy the advice in this post still stands, as you’ll still benefit during development of the branch, and also when you open your PR for review. Once merged the PR will continue to be useful as you can view the contents on GitHub and see more clearly what happened and why.

Closing

I hope that this has been a useful exploration of what makes a good commit, and the best practices like CI/CD that they help to support. It should help you to deliver better software by creating concise, well-crafted commits that your team mates will find easier to reason about, and thank you for later.

Jekyll and GitHub Actions

When deciding to resurrect this blog, I first had to do some research to choose the right software to do the job. The original blog years ago was deployed using WordPress and while I’m still a fan of WordPress I wanted to keep things super simple this time around.

At work last year I redid some internal documentation for a large Ansible automation project and had a few things in mind:

  1. The documentation for the code should live with that same code to make it easy to keep up to date as the code changes.
  2. The documentation should be as lightweight as possible, avoiding the need to maintain any hosting software or databases.
  3. The documentation should be easy to write so it doesn’t feel like a chore.

These requirements made me immediately think of Markdown. We could commit Markdown alongside the code itself, write it easily, use any editor, read it locally and so on.

Paired with a static site generator, you can actually get some really nice looking documentation with a minimum of effort. The generator takes the Markdown files, and creates static HTML pages using a template.

For the work project we ended up using software called MkDocs which is very good, but focussed around project documentation; for this site I needed to look at something more focussed on blogging. I had already decided I wanted to try GitHub Pages so that publishing a new post would be as easy as committing to a repository, and the new post would be generated and made available almost right away.

Jekyll is a static site generator that is supported by GitHub Pages out of the box and is written in Ruby, which I have experience with, so it felt like a good place to start.

I followed the quick-start instructions on the Jekyll website and was up and running pretty quickly, but I’m a tinkerer, I like to dig deeper into things and see how they work, so I found myself cloning the default theme to see exactly how it built a page and how I could customise it.

Most of the customisations I made were small, things like adding the estimated reading time to each post, displaying the categories the post belongs to, adding ARIA tags for accessibility and so on.

Committing all of this to a GitHub repository and turning GitHub Pages on in the repo settings was painless and everything worked as expected, hurray!

My next issue was that I wanted to add archive pages to list posts by category or date, so that I wouldn’t need to add this later once I actually had some content. Going back to the earlier goal of simplicity I wanted the tool to handle generating archive pages for me, but out of the box Jekyll can’t do this. It is however extensible through plugins, and I was able to find and install a plugin called jekyll-archives, but here I hit a snag; this plugin isn’t supported by the version of Jekyll that is used by GitHub Pages.

What to do? Well luckily for me, GitHub have recently launched their own CI/CD automation workflow called GitHub Actions, allowing you to perform certain actions when code is committed to a repository, so we have an option to run Jekyll directly instead of relying on the one integrated with GitHub Pages. This allows us to do anything you could do normally with Jekyll, including use custom plugins.

Building a workflow

GitHub Pages can be configured to skip running Jekyll itself and instead just take an existing set of static HTML files from a branch named gh-pages and use those, so I needed to setup a workflow for GitHub Actions that would do the following:

  • Checkout the latest revision of the repository
  • Set up a Ruby environment and install Jekyll
  • Run the jekyll build command
  • Push the result of the build command to the gh-pages branch

To create a GitHub Action you define the workflow in YAML format and commit that file into a .github/workflows/ folder in your repository, after which you’ll see it listed under the Actions tab of your repository. So let’s translate each step above into an action in our workflow, using the actions available.

Workflow start

We want to start by naming the workfow and configuring it to run any time commits are pushed to the master branch, we also configure the workflow to be run inside an Ubuntu linux environment which is setup fresh each time the workflow runs. We define the steps key which we will fill in as we go.

---
name: "Build Jekyll and push to 'gh-pages' branch"
on:
  push:
    branches:
      - master

jobs:
  build:
    runs-on: ubuntu-latest
    steps:

Checkout the code

The first item to add to steps is an action to checkout the latest revision of the master branch, which is done like so:

- name: Checkout
  uses: actions/checkout@v2

Ruby

Next we want to setup a Ruby environment and there is an action that can handle that for us:

- name: Set up Ruby
  uses: actions/setup-ruby@v1
  with:
    ruby-version: 2.6

Now we should have a Ruby environment and our Jekyll project checked out ready to go, we need to install Jekyll and it’s dependencies from the Gemfile in our project. Here we don’t need any particular action, we just want to run a command:

- name: Bundle install
  run: |
    bundle install

Jekyll

Next we run Jekyll’s build command against our project and tell it to place the resulting static HTML files in a folder named:

- name: Bundle install
  run: |
    bundle exec jekyll build -d target

Now we should have the static content ready to commit to the gh-pages branch, but I wasn’t sure how to proceed, I came across a blog post by Benjamin Lannon which shows that you can run git commands normally, however I wanted to commit to a different branch (gh-pages in this case) and only commit the result of the jekyll build command, to avoid accidentally including non-content, such as the Gemfile. After a bit of Googling I found this very helpful Gist which showed a very tidy way of avoiding this issue entirely.

Using the subtree split feature of Git we can split the repository apart by taking only the commits that affected our target folder created in the previous step. Since this will be a single commit containing the entire generated site, we then force push that to the desired branch for GitHub Pages to pick up and deploy for us.

Git config

Let’s configure a user for the commits to be made as:

- name: Setup Git config
  run: |
    git config user.name "GitHub Actions Bot"
    git config user.email "<>"

Next we create the commit using git subtree split:

- name: Commit
    run: |
      git add target
      git commit -m "$(git log -1 --pretty=%B)"
      git subtree split --prefix target -b gh-pages
      git push -f origin gh-pages:gh-pages

That’s it! Now we should be able to use the full functionality of Jekyll and any plugins we like, but we still get the simplicity of pushing a single commit to our repository, in order to publish new content. There are a couple of enhancements we can make to speed up the performane of this workflow though.

Caching

Rather than setting up the Ruby environment from scratch every time, we want to cache the gems we’re using so that they can be installed much quicker next time. There’s a Cache action we can use to do this for a variety of languages including Ruby.

First we need to include the Cache action in our workflow, place this new task above the Set up Ruby task:

- uses: actions/cache@v2
  with:
    path: vendor/bundle
    key: ${{ runner.os }}-gems-${{ hashFiles('**/Gemfile.lock') }}
    restore-keys: |
            ${{ runner.os }}-gems-

This will instruct GitHub Actions to cache the data in vendor/bundle using a specific key, in this case the key includes the operating system of the system running our workflow, and the hashFiles function is used to generate a hash for a given file, in this case our Gemfile.lock, so that we only rebuild our cache if the Gemfile (and therefore the hash) changes.

Next we need to configure Bundler to actually use this cache when installing gems. Modify the Bundle install task to look like this:

- name: Bundle install
  run: |
    bundle config path vendor/bundle
    bundle install

Summary

Putting it all together, here is the here is the complete workflow configuration we just built:

---
name: "Build Jekyll and push to 'gh-pages' branch"
on:
  push:
    branches:
      - master

jobs:
  build:
    runs-on: ubuntu-latest
    steps:
      - name: Checkout
        uses: actions/checkout@v2

      - name: Set up Ruby
        uses: actions/setup-ruby@v1
        with:
          ruby-version: 2.6

      - name: Bundle install
        run: |
          bundle install

      - name: Bundle install
        run: |
          bundle exec jekyll build -d target

      - name: Setup Git config
        run: |
          git config user.name "GitHub Actions Bot"
          git config user.email "<>"

      - name: Commit
          run: |
            git add target
            git commit -m "$(git log -1 --pretty=%B)"
            git subtree split --prefix target -b gh-pages
            git push -f origin gh-pages:gh-pages

      - uses: actions/cache@v2
        with:
          path: vendor/bundle
          key: ${{ runner.os }}-gems-${{ hashFiles('**/Gemfile.lock') }}
          restore-keys: |
            ${{ runner.os }}-gems-

      - name: Bundle install
        run: |
          bundle config path vendor/bundle
          bundle install

That’s it! We should now have a self-contained automatic workflow for publishing new content to the blog by simply commiting a new Markdown document. We have caching in place to make the process as efficient as possible, and tasks are only executed if something has changed.